


Building a deck can be an exciting project that adds both value and beauty to your home. Whether you’re creating a small patio for family gatherings or a large entertaining space, a well-built deck is a rewarding addition to any yard. In this step-by-step guide, we’ll walk you through the essential steps to build your deck—from planning and permits to finishing touches. Let’s get started!
1. Plan Your Deck
Before you begin construction, you need to plan your deck carefully. This includes deciding the size, shape, and location of your deck.
- Size & Shape: Determine how much space you want for your deck. Consider factors like how many people will use it, the view, and whether you want additional features like stairs or railings.
- Location: Choose a location that gets good sunlight but is also away from potential hazards like tree roots or utility lines. Make sure it’s level and accessible from your home.
- Design: Sketch your design on paper. There are many online tools available to help you design your deck.
Planning is key to ensuring that your deck is functional and looks great.
2. Check Local Regulations and Permits
Before starting any construction, check your local building codes and get the necessary permits. Deck construction often requires approval from your city or county.
- Permits: Depending on the size of your deck, you may need to apply for a permit. This ensures the structure will be safe and up to code.
- Setbacks: Verify any setback requirements (how far your deck needs to be from property lines or other structures).
- Inspections: Some areas require an inspection of the footings and framing before you can continue building.
Be sure to follow these regulations to avoid future headaches.
3. Gather Materials and Tools
Once your design and permits are in place, gather all the materials and tools you’ll need. Here’s a general list:
- Lumber: Pressure-treated wood, cedar, or composite for the frame and decking boards.
- Concrete Footings: To secure the posts in the ground.
- Decking Screws or Nails: Specifically designed for outdoor use to ensure durability.
- Tools: Circular saw, drill, level, measuring tape, hammer, and post hole digger.
Buying quality materials is essential for a long-lasting deck.
4. Prepare the Ground
Prepare the site by clearing the area of debris, rocks, or vegetation. You’ll want to ensure that the ground is level and stable.
- Dig Holes for Footings: Use a post hole digger or auger to dig holes for the concrete footings. The depth will depend on local regulations but is usually about 3 feet deep to ensure stability.
- Level the Ground: Use a level to make sure the ground is flat. This will make it easier to install your deck correctly.
A solid foundation is key to building a strong, lasting deck.
5. Install the Footings and Posts
Once the ground is prepared, it’s time to install the concrete footings and posts.
- Place Concrete Footings: Pour concrete into the holes you’ve dug to form the footings. Allow the concrete to cure for at least 24 hours before proceeding.
- Attach the Posts: Secure vertical posts to the footings using metal post brackets or by embedding them directly into the concrete. Make sure the posts are square and level.
This step is essential for ensuring that your deck will be stable and secure.
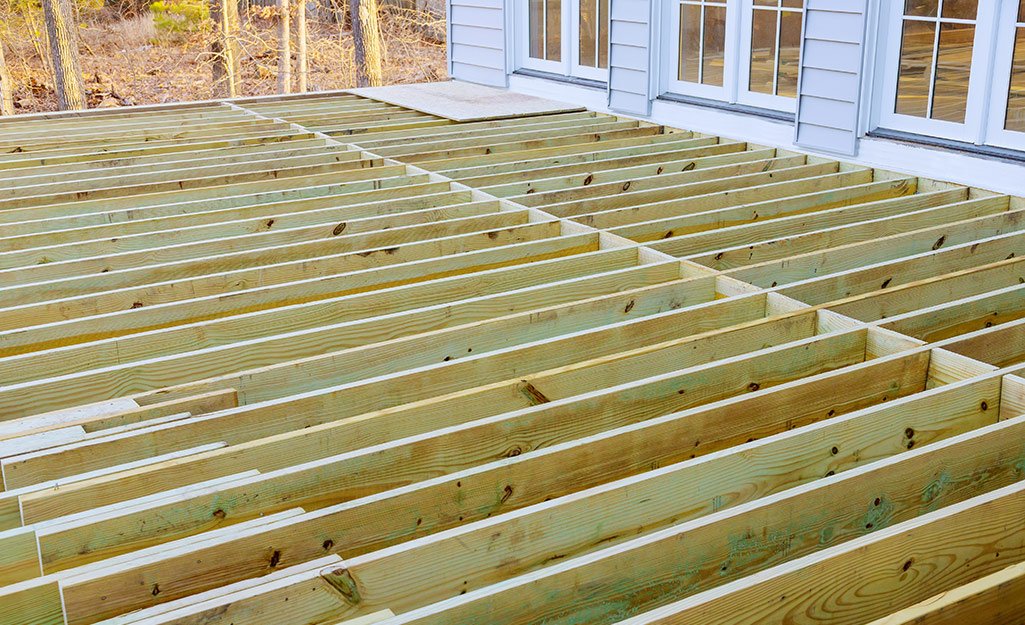
6. Build the Frame
With your posts in place, you can now start building the frame of the deck. The frame serves as the foundation for the decking boards.
- Install Beams: Attach horizontal beams to the posts. These will support the weight of the deck.
- Attach Joists: Install the joists (horizontal beams that support the decking boards) perpendicular to the beams. Use joist hangers to secure them in place. Make sure the spacing between joists is consistent, typically 16 inches apart.
The frame is crucial to supporting the weight of the decking material and any furniture you place on the deck.
7. Install the Decking Boards
Once the frame is in place, it’s time to install the decking boards.
- Start from the Edge: Begin at the outer edge of the deck and work your way in. Lay each board perpendicular to the joists.
- Leave Gaps for Drainage: It’s important to leave small gaps between each decking board to allow for drainage and prevent water from pooling. A gap of about 1/8 inch is recommended.
- Screw or Nail the Boards: Secure the boards with screws or nails designed for outdoor use. Screws are generally preferred because they hold better over time.
Ensure the decking boards are aligned and straight for a polished look.
8. Build Stairs (If Needed)
If your deck is elevated or you want to provide access to the ground level, you may need to build stairs.
- Measure the Height: Determine the height from the deck to the ground. This will tell you how many steps are needed.
- Install Stringers: Cut and install stringers (the diagonal supports that hold the steps). Make sure they are evenly spaced.
- Attach Steps: Install the individual steps using decking material. Make sure they’re secure and level.
Stairs can add functionality and safety to your deck, especially if it’s elevated.
9. Add Railings (If Required)
Some areas require deck railings, especially if your deck is elevated. Adding railings can also improve the safety and aesthetic of your deck.
- Install Posts for Railings: Attach posts around the edge of the deck, spacing them evenly. These posts will support the railing.
- Attach Railing: Depending on your design, you can use horizontal or vertical balusters and a top rail. Use screws or nails to secure the railing to the posts.
Make sure the railings are sturdy and meet local building codes for safety.
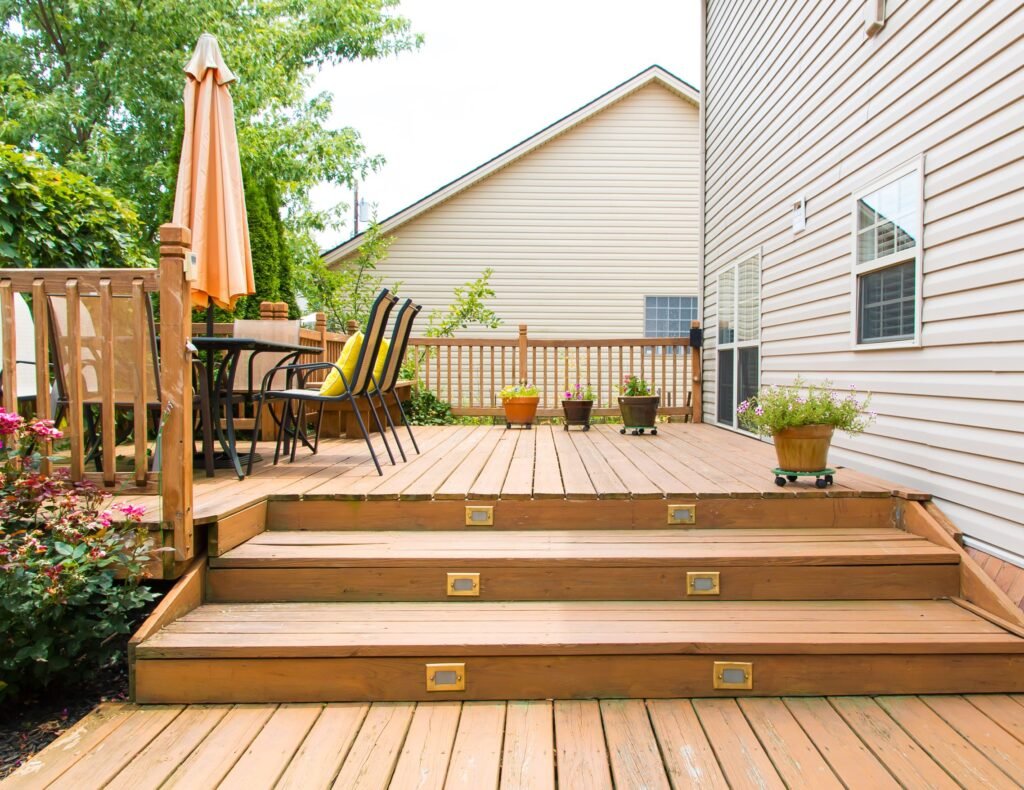
10. Finishing Touches
After your deck structure is complete, it’s time for the finishing touches.
- Sand the Deck: If using wood decking, sand down any rough edges to prevent splinters.
- Apply Stain or Sealant: To protect your wood deck from weather damage, apply a wood stain or sealant. This will help maintain the wood’s color and prevent moisture from seeping in.
- Decorate: Add outdoor furniture, planters, and accessories to make your deck a comfortable space for relaxation and entertainment.
Finishing touches are important for both aesthetics and long-term maintenance.
Conclusion
Building a deck is a project that requires time, planning, and attention to detail. By following these steps—planning, gathering materials, preparing the ground, and assembling the structure—you can create a beautiful and functional outdoor space that will last for years. Whether you’re an experienced DIYer or a first-time builder, this guide will help you through the process, step by step. Enjoy your new deck and the many memories you’ll create on it!


