Author: Kate Richardson

  • Best Tools for DIY Flooring Installation

    Best Tools for DIY Flooring Installation

    Installing new flooring on your own is a great way to save money and customize your space. Whether you’re tackling hardwood, laminate, tile, or vinyl, the right tools will make your DIY flooring installation smoother, faster, and more professional. Here’s a list of the best tools you’ll need to achieve great results in your flooring project.

    1. Measuring Tape

    Accurate measurements are essential to ensuring that your flooring fits perfectly. A good measuring tape will help you plan and cut your flooring to the right size.

    • Key Features: A retractable tape with clear markings, a durable casing, and a locking mechanism to keep the tape in place while you measure.
    • Tip: Measure twice and cut once to avoid mistakes and waste.

    2. Utility Knife

    A utility knife is an indispensable tool for cutting flooring materials like vinyl, laminate, and carpet. It provides precision and control for straight cuts and trimming.

    • Key Features: A sharp, retractable blade and ergonomic handle for comfort during extended use.
    • Tip: Always replace the blade when it becomes dull to ensure clean, easy cuts.

    3. Miter Saw (For Hardwood and Laminate)

    If you’re installing hardwood or laminate flooring, a miter saw is essential for cutting planks to the right length and making angled cuts. This tool is especially useful for trimming flooring to fit around corners or edges.

    • Key Features: Adjustable angles, sharp blades, and a dust collection system to keep the work area clean.
    • Tip: Wear safety goggles and ear protection, as miter saws can be loud and produce flying debris.

    4. Flooring Adhesive Applicator (For Vinyl or Tile)

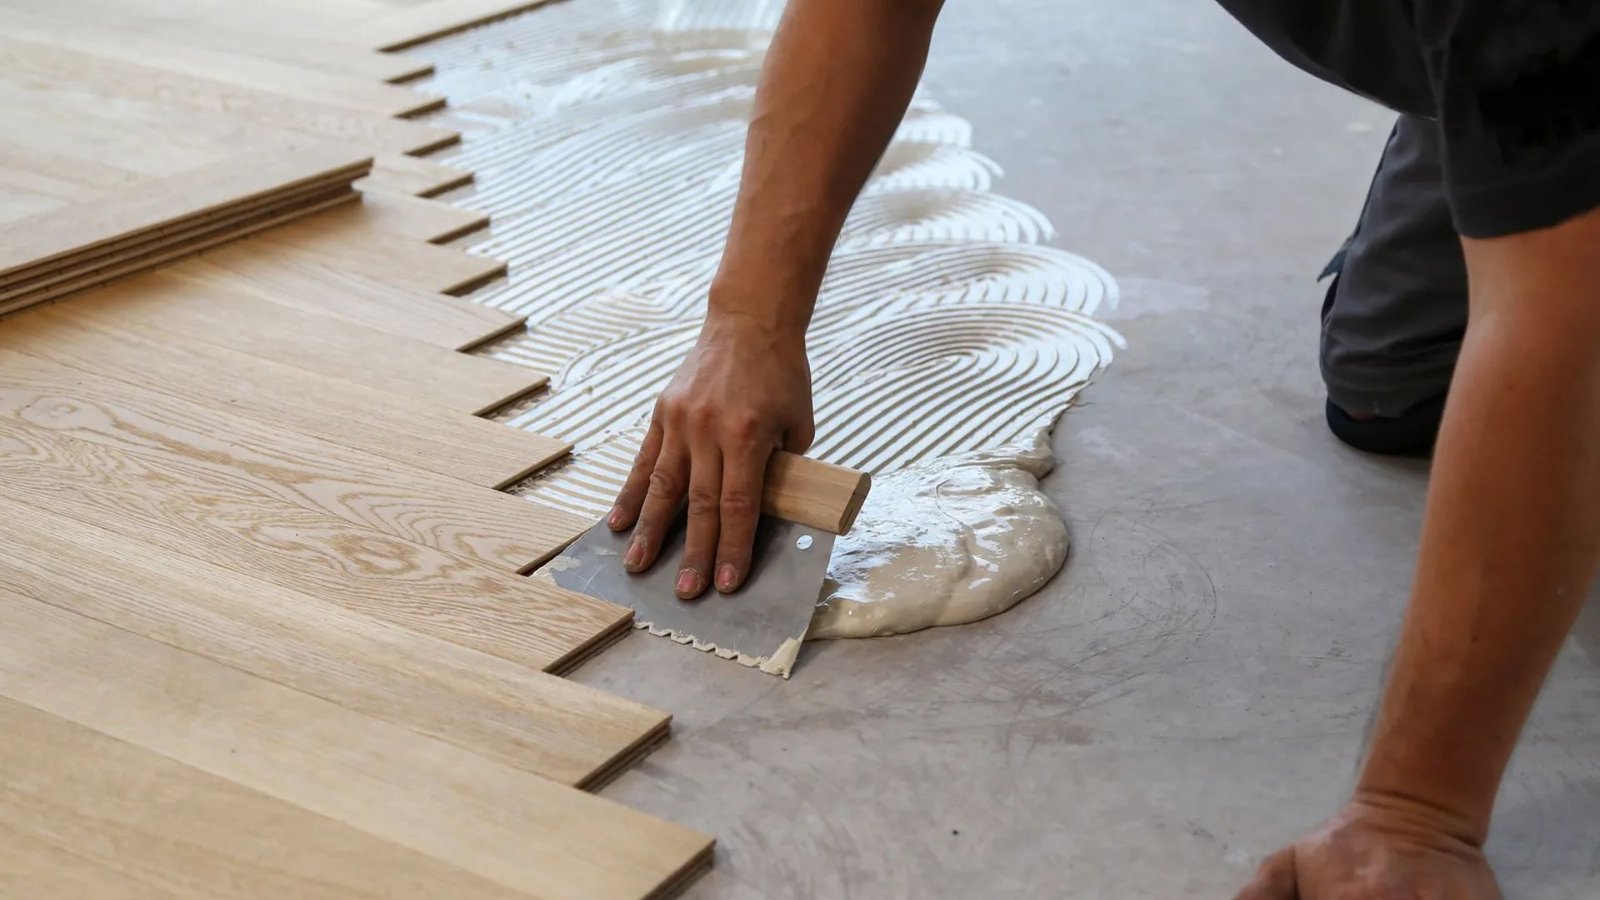
    For installing vinyl or tile flooring, an adhesive applicator is a must. It helps spread the glue evenly on the floor and ensures a secure bond between the flooring and the subfloor.

    • Key Features: A trowel with teeth for spreading adhesive evenly, and a comfortable handle for ease of use.
    • Tip: Use a notched trowel for tile and vinyl installations to create the right adhesive pattern.

    5. Rubber Mallet

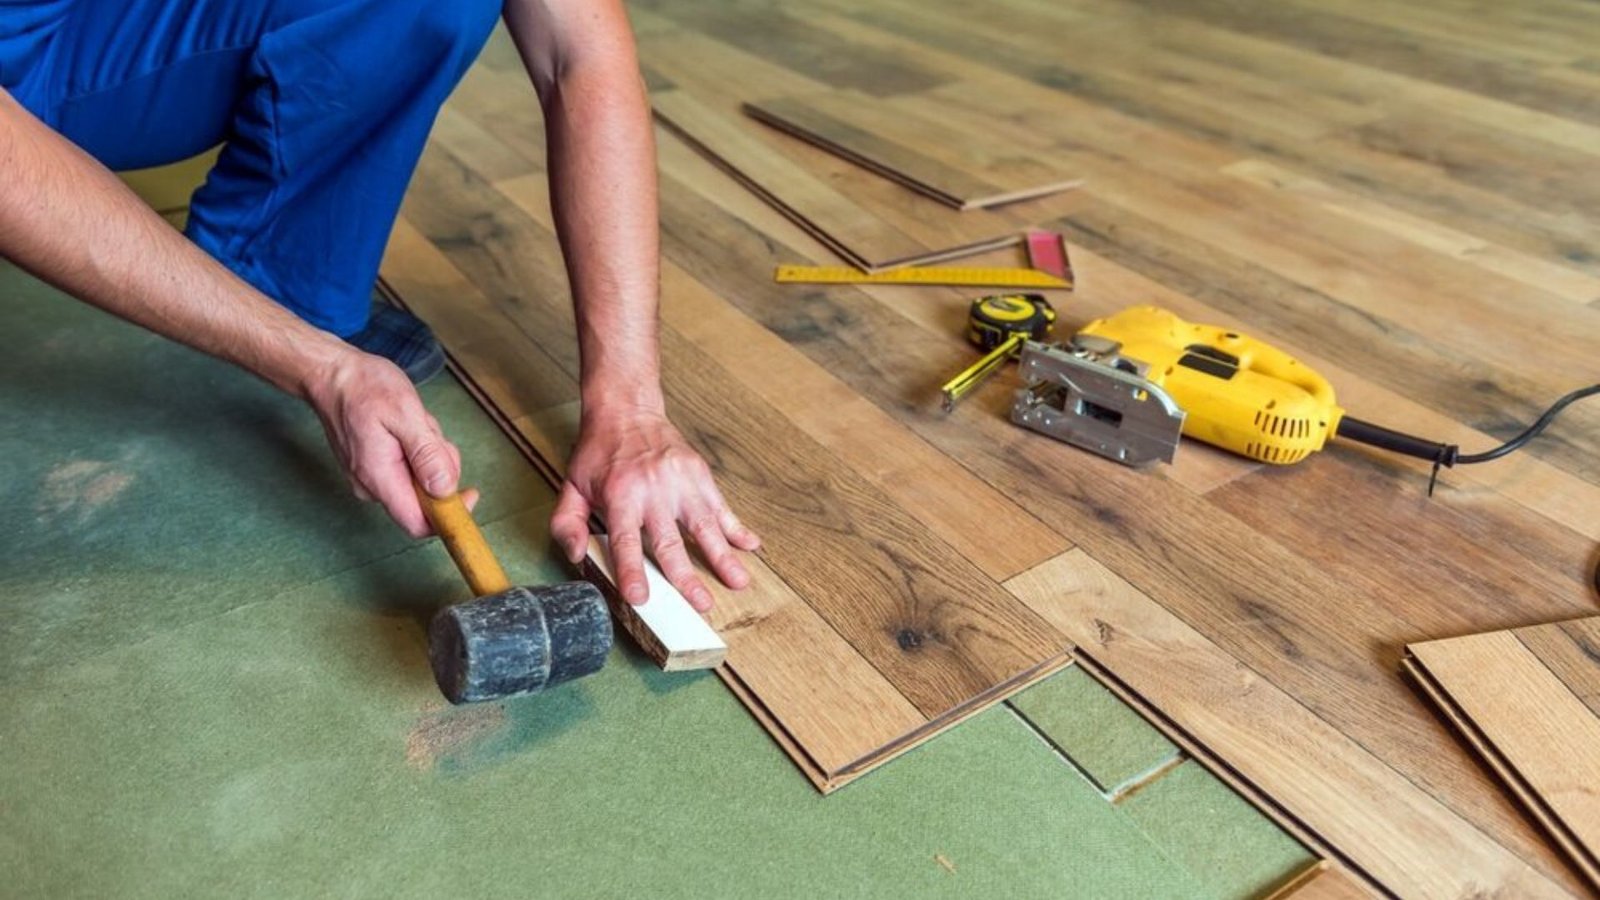
    A rubber mallet is perfect for tapping your flooring into place without damaging the surface. It helps ensure that the planks or tiles fit snugly together.

    • Key Features: A non-marring, soft rubber head that won’t leave dents or scratches on your flooring.
    • Tip: Use the mallet to tap down edges and help joints fit tightly together during installation.

    6. Spacers (For Laminate and Hardwood)

    Spacers are necessary when installing laminate or hardwood floors. These small plastic pieces create a gap between the wall and the flooring, allowing for expansion and contraction as the floor acclimates to temperature and humidity changes.

    • Key Features: Adjustable spacers that provide precise gaps to ensure proper floor expansion.
    • Tip: Don’t forget to remove the spacers once the floor is installed and before adding trim or baseboards.

    7. Tile Cutter (For Ceramic or Porcelain Tile)

    If you’re installing ceramic or porcelain tiles, a tile cutter is essential for making straight cuts. It’s much easier and more precise than trying to use a regular saw for tile work.

    • Key Features: A manual tile cutter with a score wheel for making clean cuts and a lever to break tiles along the scored line.
    • Tip: For complex cuts, such as around outlets or curves, consider using a wet saw.

    8. Laser Level

    A laser level helps ensure that your floors are perfectly level and aligned. It’s especially helpful for large flooring projects where precision is key to achieving a polished, professional look.

    • Key Features: Horizontal and vertical laser lines for measuring levelness, with adjustable settings for different project heights.
    • Tip: Use the laser level to check the floor’s level before you start laying down your first piece of flooring.

    9. Jigsaw (For Detailed Cuts)

    If your flooring project requires intricate cuts around obstacles like pipes, vents, or corners, a jigsaw is the best tool for the job. It allows for precise, curved, or irregular cuts with ease.

    • Key Features: A saw with interchangeable blades for different materials and the ability to cut in multiple directions.
    • Tip: Use a fine-tooth blade for laminate and vinyl to prevent damage or tearing.

    10. Flooring Pull Bar (For Laminate and Hardwood)

    A flooring pull bar is useful for clicking laminate or hardwood planks together, especially in tight spaces where a mallet might not fit. It helps you pull the planks together to create tight seams.

    • Key Features: A metal tool with a flat edge that helps you apply even pressure along the seams.
    • Tip: Use the pull bar carefully to avoid damaging the edges of the planks.

    11. Tapping Block (For Laminate and Hardwood)

    A tapping block is another great tool for joining laminate or hardwood flooring planks without damaging the edges. It provides a safe way to tap the planks into place.

    • Key Features: A hard wood block that prevents damage to the tongue-and-groove joint of laminate or hardwood floors.
    • Tip: Place the tapping block on the edge of the plank to distribute the force evenly and prevent breakage.

    12. Knee Pads

    Flooring installation can be hard on your knees, especially if you’re working on a large area. Knee pads are essential for protecting your knees from the hard surface and ensuring comfort during the installation process.

    • Key Features: Padded, adjustable straps for a secure fit and comfort during long periods of kneeling.
    • Tip: Look for knee pads with non-slip material to prevent them from sliding off during use.

    13. Sponge or Mop (For Clean-Up)

    After installing your flooring, you’ll need to clean up any adhesive residue, dust, or debris. A mop or sponge is perfect for wiping down the surface to keep your floors looking spotless.

    • Key Features: Soft, absorbent materials for cleaning up without scratching your new floors.
    • Tip: Use a gentle cleaning solution and avoid harsh chemicals that can damage your new flooring.

    14. Floor Roller (For Vinyl or Carpet)

    A floor roller helps to press your vinyl or carpet flooring down firmly, ensuring it sticks to the subfloor and remains smooth without bubbles or wrinkles.

    • Key Features: A heavy roller with a comfortable handle, ideal for evenly pressing down large surfaces of vinyl or carpet.
    • Tip: Use the roller in a back-and-forth motion to make sure the adhesive bonds fully with the subfloor.

    Conclusion

    DIY flooring installation is a rewarding project, and having the right tools can make the job much easier and more efficient. From measuring tapes and utility knives to rubber mallets and laser levels, these essential tools will help you achieve a professional-looking result. By ensuring you have everything you need, you’ll be ready to tackle your flooring project with confidence and skill. Whether you’re installing vinyl, tile, laminate, or hardwood, the right tools are key to a successful DIY flooring installation.

  • How to Choose the Best Flooring for Your Basement

    How to Choose the Best Flooring for Your Basement

    When it comes to finishing your basement, one of the most important decisions is selecting the right flooring. Basements often have unique challenges, such as humidity, temperature fluctuations, and the potential for moisture damage. It’s crucial to choose a flooring option that not only looks good but can also withstand these factors. The right basement flooring can improve the space’s overall appeal and functionality. Here’s how to choose the best flooring for your basement.

    1. Consider Moisture Resistance

    Basements are often prone to moisture problems due to their location below ground level. High humidity and the potential for water seepage can damage certain types of flooring. That’s why moisture resistance is one of the most important factors to consider.

    • Waterproof Options: Materials like luxury vinyl, tile, and concrete are excellent for basements because they are highly resistant to water damage.
    • Moisture Barriers: If you choose carpet, hardwood, or laminate, ensure that you use an underlayment or moisture barrier to protect the flooring from moisture damage.

    Choosing moisture-resistant flooring will prevent long-term issues such as warping, staining, or mold growth.

    How to Choose the Best Flooring for Your Basement
    How to Choose the Best Flooring for Your Basement

    2. Look for Durability

    Basements are often high-traffic areas, whether they’re used for entertaining, storage, or as a living space. Durable flooring is essential to ensure your floors can stand up to heavy use, especially with family members or guests walking on them frequently.

    • Vinyl and Tile: These options are highly durable, scratch-resistant, and easy to maintain. They are also excellent for areas with heavy furniture or foot traffic.
    • Concrete and Epoxy: Concrete floors, especially with an epoxy finish, are incredibly durable and resistant to damage. You can also customize them with different finishes or colors.

    Durability is key when choosing a basement flooring material, as it will help the floors maintain their appearance and functionality for years.

    3. Temperature Considerations

    Basements can be cooler than the rest of the home due to their below-ground location. It’s important to choose flooring that provides comfort in colder temperatures. Consider how warm or cool the flooring feels underfoot.

    • Carpet: Carpeting adds warmth and comfort, making it a good choice for basements where you’ll spend a lot of time barefoot, such as in a home theater or family room.
    • Vinyl and Cork: These materials are also warm underfoot, and cork, in particular, has natural insulating properties.
    • Tile and Concrete: These materials can feel cold in the winter months. However, if you prefer them for their durability or appearance, you can add rugs or install radiant floor heating underneath.

    Choose a flooring material that makes the space more comfortable, especially if you plan to use the basement as a living or entertainment area.

    4. Ease of Installation

    If you’re looking to complete your basement flooring on a budget or within a short time frame, ease of installation will be a priority. Many flooring materials are available in DIY-friendly formats that don’t require professional installation.

    • Peel-and-Stick Vinyl: Vinyl tiles or planks with peel-and-stick adhesive are easy to install and can often be done by homeowners without professional help.
    • Interlocking Foam Tiles: These soft and cushioned tiles are easy to snap together and are ideal for areas like playrooms or home gyms.
    • Laminate and Engineered Hardwood: Both options come with click-lock installation systems, making them simple to install without glue or nails.

    Consider the level of expertise required for installation and how much time and effort you are willing to invest.

    5. Aesthetic Appeal

    The look of your basement flooring is essential, especially if you plan to use the space for gatherings or as a living area. Fortunately, there are many stylish flooring options to choose from that can complement your basement’s décor.

    • Vinyl Plank Flooring: Luxury vinyl planks (LVP) mimic the appearance of hardwood or stone, adding an elegant touch to your basement while offering water resistance and durability.
    • Tile: Ceramic or porcelain tile offers a variety of patterns, textures, and colors, allowing you to customize your basement’s appearance.
    • Carpet and Area Rugs: If you want warmth and softness, carpet can add a cozy feel, and area rugs can also help tie the space together.

    Choose a flooring material that matches your style and helps create the look you want for your basement.

    6. Cost-Effectiveness

    Budget is always a consideration when choosing new flooring. Basement flooring can vary widely in price, so it’s essential to balance your desired look with your budget.

    • Budget-Friendly Options: Vinyl, laminate, and carpet tend to be more affordable than hardwood or natural stone, making them great options if you’re working with a limited budget.
    • Long-Term Value: While initial costs for materials like hardwood or tile may be higher, they can add value to your home in the long run. These materials may also last longer, reducing the need for repairs or replacements.

    Factor in both the upfront and long-term costs of your flooring options to make an informed decision.

    7. Maintenance Requirements

    Basement floors can accumulate dirt, dust, and moisture. It’s important to choose flooring that’s easy to clean and maintain, especially in a space that may see heavy foot traffic.

    • Tile and Vinyl: These materials are easy to clean and don’t require much maintenance. Simply sweeping, mopping, or vacuuming is enough to keep them looking great.
    • Carpet: While carpet can add warmth and comfort, it may require more upkeep, such as regular vacuuming and occasional deep cleaning to prevent moisture buildup.
    • Concrete: A polished or sealed concrete floor is low-maintenance but may need periodic resealing to maintain its durability.

    Consider how much time you’re willing to spend on upkeep and choose a flooring that suits your maintenance preferences.

    8. Safety Features

    If you plan to use your basement as a play area for children or a home gym, safety is a crucial consideration. Some flooring options offer added safety benefits.

    • Rubber Flooring: Rubber tiles or rolls are ideal for home gyms or playrooms because they offer cushioning and prevent slips.
    • Cork Flooring: Cork is soft underfoot and slip-resistant, making it a great choice for family areas.
    • Carpet: Soft, cushioned carpet provides a safe surface for kids to play on and reduces the risk of injuries from falls.

    Ensure that your chosen flooring is safe for your specific needs, especially if you have small children or use the basement for activities that involve physical movement.

    Conclusion

    Choosing the best flooring for your basement requires careful consideration of factors like moisture resistance, durability, comfort, and aesthetics. Whether you opt for vinyl, tile, carpet, or concrete, make sure the flooring you select can handle the unique challenges of a basement environment while providing the style and functionality you need. With the right flooring, your basement can become a welcoming, comfortable, and functional space for years to come.

  • Modern Flooring Trends For Homes

    Modern Flooring Trends For Homes

    When it comes to updating your home, the right flooring can make all the difference. Modern flooring trends bring fresh styles, innovative materials, and practical solutions to your living space. Whether you’re renovating or building a new home, these trends will help you create beautiful, functional floors that complement your style. Let’s dive into some of the most popular flooring trends today.

    Modern Flooring Trends For Homes
    Modern Flooring Trends For Homes

    1. Sustainable and Eco-Friendly Flooring

    Trend 1: More homeowners are turning to sustainable and eco-friendly flooring options.
    Materials like bamboo, cork, and reclaimed wood are gaining popularity because they’re renewable and less harmful to the environment. Bamboo, for example, is a fast-growing resource, while cork comes from the bark of cork oak trees, which regenerate after harvesting. These options allow you to have stylish floors while also reducing your environmental footprint.

    2. Waterproof Flooring

    Trend 2: Waterproof flooring is a must-have, especially for areas like kitchens, bathrooms, and basements.
    Luxury vinyl planks (LVP) and waterproof laminate flooring are in high demand. They offer the look of hardwood or stone without the worry of water damage. With a variety of styles and colors available, these floors are perfect for homeowners looking for durability and style in moisture-prone areas.

    3. Engineered Hardwood Floors

    Trend 3: Engineered hardwood continues to be a top choice for homeowners.
    Unlike traditional hardwood, engineered hardwood is made from layers of wood, providing extra stability and resistance to temperature and moisture changes. This makes it a great option for areas like basements or homes in humid climates. It also offers the same beautiful appearance of solid wood, making it a popular flooring choice.

    4. Bold and Dark Tones

    Trend 4: Darker wood tones are becoming increasingly popular in modern homes.
    Dark shades like ebony, walnut, and espresso add sophistication and warmth to any room. These tones pair beautifully with minimalist or contemporary interior design and create a striking contrast against lighter walls and furnishings. They’re perfect for adding drama and elegance to living rooms, dining rooms, or even bedrooms.

    5. Mixed Materials

    Trend 5: Mixing materials in flooring is a growing trend.
    Homeowners are opting for creative combinations of wood, stone, and tile to create unique patterns and textures. For example, you might see wood planks alongside tiles that mimic natural stone or concrete. This trend allows you to play with different looks and textures, giving each room its own oersonality.

    6. Large Format Tiles

    Trend 6: Large format tiles are taking over the design world.
    Tiles that are 24 inches or more on one side are being used in kitchens, bathrooms, and even living rooms. Large tiles create a seamless and clean look, making spaces feel bigger and more open. They’re especially popular in modern designs, where simplicity and elegance are key.

    7. Textured Flooring

    Trend 7: Textured flooring is another popular trend, adding depth and interest to your space.
    From wire-brushed hardwood to textured stone and concrete, these floors have a tactile element that draws the eye. Textured floors also tend to be more forgiving when it comes to showing dirt and scratches, making them a practical choice for high-traffic areas.

    8. Matte Finishes

    Trend 8: Matte finishes are replacing glossy floors.
    Matte finishes give floors a more natural, subtle look, which is highly sought after in modern homes. They’re particularly popular in natural materials like wood and stone because they allow the material’s texture and grain to shine through. Matte floors are also easier to maintain since they don’t show dust and fingerprints as easily as glossy ones.

    9. Minimalist Style Flooring

    Trend 9: Minimalism continues to influence flooring trends.
    Simple, clean designs with neutral colors and smooth textures are trending in modern homes. Light-colored wood or stone floors with a natural finish are ideal for minimalist interiors. This type of flooring enhances the sense of space and allows other design elements, like furniture and artwork, to stand out.

    10. Multi-Functional Flooring

    Trend 10: Multi-functional flooring is gaining traction, especially in smaller homes or apartments.
    These floors are designed to be versatile and durable, with features that adapt to different areas of the home. For instance, floors that are both stylish and durable enough to handle pets, children, and heavy foot traffic. Multi-functional floors often incorporate features like noise reduction and scratch resistance.

    Conclusion

    Modern flooring trends focus on blending style with practicality. Sustainable options, waterproof materials, and unique combinations of textures and colors are leading the way. Whether you’re updating your kitchen, bathroom, or living room, there’s a trend to suit every taste and home. Stay ahead of the curve by embracing these exciting flooring trends, and transform your living space into something truly special.

  • How To Clean Hardwood Flooring

    How To Clean Hardwood Flooring

    Hardwood flooring adds beauty and warmth to your home, but it requires proper care to keep it looking its best. Cleaning hardwood floors is simple if you know the right methods. Regular maintenance will help prevent damage and preserve the natural beauty of the wood. In this guide, we’ll show you how to clean hardwood floors effectively and safely.

    How To Clean Hardwood Flooring
    How To Clean Hardwood Flooring

    1. Dust and Sweep Regularly

    Step 1: Dusting and sweeping your hardwood floors regularly is essential to prevent dirt and debris from scratching the surface.
    Use a microfiber dust mop or broom to remove dust, dirt, and pet hair from the floor. Avoid using a traditional broom with hard bristles, as it can scratch the floor. Sweeping daily or at least a few times a week helps maintain the wood’s finish.

    2. Vacuum With Care

    Step 2: You can also vacuum your hardwood floors, but be sure to use the correct attachment.
    Switch to the hardwood floor setting or use a vacuum with a soft brush head to prevent scratching the wood. Never use a vacuum with a beater bar, as it can cause damage to the floor.

    3. Mop with the Right Solution

    Step 3: Once the floor is free from dust and debris, it’s time to mop. However, water can damage hardwood floors, so you need to be careful.

    • Use a damp mop, not a wet one, to avoid water pooling on the floor.
    • Use a cleaner specifically made for hardwood floors. You can also make a DIY solution by mixing a few drops of dish soap with warm water.
    • Avoid harsh chemicals like bleach or ammonia, as they can damage the finish.

    4. Wipe Up Spills Immediately

    Step 4: Hardwood floors are sensitive to moisture. It’s important to wipe up any spills as soon as they occur to prevent water damage or staining.
    Use a soft cloth or paper towel to quickly blot the spill. For sticky substances, you can use a mild hardwood floor cleaner to wipe it away.

    5. Buff the Floor After Mopping

    Step 5: After mopping, use a dry, soft microfiber cloth to buff the floor.
    Buffing helps to remove any excess moisture and adds shine to your hardwood floors, making them look fresh and clean.

    6. Avoid Harsh Cleaning Tools

    Step 6: When cleaning your hardwood floors, avoid using harsh tools like steel wool, scouring pads, or abrasive sponges. These can scratch the surface and damage the finish of the wood.
    Stick to soft, non-abrasive cleaning cloths and mops to keep your floors safe.

    7. Protect the Floor

    Step 7: To keep your hardwood floors in top condition, take steps to protect them.

    • Place rugs or mats in high-traffic areas to prevent wear and tear.
    • Put felt pads under furniture legs to avoid scratching the floor when moving items around.
    • Trim your pet’s nails to prevent them from scratching the floor.

    Conclusion

    Cleaning hardwood floors is a simple task when done regularly and correctly. Dust, sweep, and vacuum to keep debris off the floor. Mop with a damp mop and hardwood-friendly cleaner to maintain the wood’s shine and protect its finish. By following these tips, you can ensure your hardwood floors stay beautiful for years to come.

  • Top Reasons to Upgrade Your Flooring Today

    Top Reasons to Upgrade Your Flooring Today

    Flooring is one of the most important elements of your home. It not only impacts the overall look and feel of your living space but also plays a significant role in its functionality and value. If you’ve been considering upgrading your flooring, there are plenty of reasons to make the change. Whether it’s for aesthetics, practicality, or long-term savings, here are the top reasons why you should upgrade your flooring today.

    1. Enhance the Aesthetic Appeal

    The flooring in your home sets the tone for the entire space. Outdated or worn-out floors can make your home look tired and less inviting. By upgrading to modern flooring options, you can instantly enhance the aesthetic appeal of any room.

    • Add Style and Elegance: New flooring can dramatically change the look of your home, giving it a fresh, contemporary feel. Whether you choose hardwood, luxury vinyl, or tile, the right flooring can complement your décor and create a cohesive style.
    • Variety of Options: With a wide range of materials, colors, and designs available, you can find flooring that matches your personal taste and the design vision you have for your home.

    Upgrading your flooring is one of the most effective ways to boost your home’s visual appeal.

    Top Reasons to Upgrade Your Flooring Today
    Top Reasons to Upgrade Your Flooring Today

    2. Increase Home Value

    If you plan to sell your home in the future, upgrading your flooring can significantly increase its market value. Potential buyers are often drawn to homes with modern, well-maintained floors, making it a worthwhile investment.

    • Attract Buyers: Homes with updated flooring tend to sell faster and for higher prices. New flooring can make your home feel move-in ready and reduce the need for buyers to budget for costly renovations.
    • Long-Term Investment: Quality flooring materials, such as hardwood or tile, are durable and can last for decades, making your home more appealing to buyers looking for long-lasting features.

    By investing in new flooring, you’re making an improvement that can pay off in the long run.

    3. Improve Comfort and Functionality

    New flooring can significantly improve the comfort and functionality of your home. Whether you’re looking for warmth, sound insulation, or easier maintenance, upgraded floors can meet your specific needs.

    • Comfort Underfoot: Materials like carpet, cork, or vinyl can offer a more comfortable and warmer feel underfoot, which is especially beneficial in colder climates.
    • Easier Maintenance: If your current flooring is difficult to clean or maintain, upgrading to low-maintenance options like luxury vinyl or tile can save you time and effort. These materials are often resistant to stains and easier to clean than older floors.
    • Noise Reduction: Flooring options like cork or carpet can help reduce noise levels in your home, making it a quieter and more peaceful environment.

    Choosing the right flooring can create a more comfortable living space while meeting your functional needs.

    4. Increase Durability and Longevity

    Old floors may have become worn down, scratched, or damaged over time, leading to a decrease in their durability. Upgrading to more durable materials can help ensure that your floors last longer and stand up to daily wear and tear.

    • Resistant to Damage: Modern flooring options like engineered hardwood, porcelain tile, and luxury vinyl are designed to resist scratches, dents, and moisture, making them perfect for high-traffic areas or homes with children and pets.
    • Less Maintenance: With more durable materials, you’ll spend less time and money on repairs or replacements. Long-lasting floors save you from the hassle and cost of constant upkeep.

    Upgrading to a durable flooring option will help protect your investment and ensure your floors continue to look great for years to come.

    5. Boost Energy Efficiency

    Some flooring materials, like cork or carpet, offer natural insulation, helping to regulate the temperature in your home. Upgrading to more energy-efficient flooring can help reduce heating and cooling costs.

    • Temperature Regulation: Floors like cork or wool carpet naturally trap heat in the winter and keep spaces cool in the summer, making your home more energy-efficient.
    • Improved Insulation: Insulated floors can help lower your energy bills by reducing the need for heating and cooling systems to work as hard.

    Upgrading to energy-efficient flooring is an eco-friendly way to lower your energy consumption while enhancing comfort.

    6. Improve Indoor Air Quality

    If you or your family members suffer from allergies or asthma, upgrading your flooring can help improve the air quality in your home. Some flooring materials can trap dust, pet dander, and allergens, while others are easier to clean and maintain.

    • Allergy-Friendly Flooring: Hard surfaces like tile, hardwood, or luxury vinyl are less likely to trap dust and allergens than carpet. These floors are easier to sweep, mop, or vacuum, helping you maintain a cleaner environment.
    • Healthier Living Environment: Low-VOC (volatile organic compounds) flooring options, such as bamboo or cork, emit fewer harmful chemicals, improving the overall air quality in your home.

    If health is a concern, upgrading to flooring that is easier to clean and made from non-toxic materials can benefit everyone’s well-being.

    7. Create a Safer Environment

    As floors age, they may become slippery, cracked, or uneven, leading to an increased risk of slips, trips, and falls. New flooring can make your home safer for everyone, especially young children, elderly family members, and pets.

    • Slip-Resistant Options: Many modern flooring materials, like rubber, cork, and textured vinyl, offer slip-resistant surfaces that can help prevent accidents.
    • Even Surface: If your current floors have become warped or damaged over time, upgrading to a smooth, even surface can reduce the risk of tripping and falling.

    Safety should always be a priority in your home, and new flooring can provide a safer, more secure environment for everyone.

    8. Stay on Trend

    Flooring trends constantly evolve, and upgrading your floors can help ensure your home stays up to date with the latest design trends. Whether you’re looking for a rustic wood look or a sleek, modern tile, there’s something to suit every style.

    • Fresh, Modern Look: Upgrading your floors gives your space a modern, stylish look. Materials like reclaimed wood, large-format tiles, and neutral-toned luxury vinyl are popular in contemporary homes.
    • Customization Options: Today’s flooring options come in a variety of finishes, textures, and colors, so you can choose a floor that perfectly complements your style and preferences.

    A flooring upgrade can breathe new life into your home and keep it looking fresh and trendy.

    Conclusion

    Upgrading your flooring can provide numerous benefits, from enhancing your home’s aesthetic appeal to increasing its value, functionality, and comfort. Whether you’re looking for a more durable, energy-efficient, or allergy-friendly option, there’s a flooring material to meet your needs. If your current floors are outdated, worn, or damaged, upgrading to modern flooring is a worthwhile investment that can make a significant difference in your home’s appearance and quality of life.

  • Pros And Cons Of Flooring

    Pros And Cons Of Flooring

    When it comes to choosing the right flooring for your home, there are many options to consider. Each type of flooring comes with its own set of benefits and drawbacks, so it’s important to weigh the pros and cons carefully. From hardwood to tile to carpet, the choice you make depends on your budget, lifestyle, and preferences. Below, we explore the pros and cons of the most popular types of flooring to help you make an informed decision.

    Pros And Cons Of Flooring
    Pros And Cons Of Flooring

    1. Hardwood Flooring

    Pros:

    • Durability: Hardwood is long-lasting and can stand up to heavy foot traffic when properly maintained.
    • Timeless Appeal: It adds elegance and can increase your home’s resale value.
    • Easy to Clean: Hardwood floors are easy to sweep or vacuum, and occasional mopping keeps them looking great.
    • Refinishing: You can refinish hardwood floors if they get scratched or worn, which can restore their original look.

    Cons:

    • Cost: Hardwood is one of the more expensive flooring options, both in terms of material and installation.
    • Sensitive to Moisture: Hardwood can warp or buckle if exposed to too much moisture, making it unsuitable for bathrooms or basements.
    • Scratches Easily: While durable, hardwood can still be scratched by pets or heavy furniture if not properly cared for.

    2. Carpet Flooring

    Pros:

    • Comfort: The carpet is soft underfoot and provides warmth, making it ideal for bedrooms or living rooms.
    • Noise Reduction: Carpet helps reduce noise, which is beneficial in multi-story homes or apartments.
    • Cost-Effective: Generally, carpet is cheaper than other flooring options like hardwood or tile.
    • Variety of Styles: Carpet comes in many colors, textures, and patterns to suit any design style.

    Cons:

    • Maintenance: The carpet requires regular cleaning to keep it looking fresh and free from stains.
    • Durability: Carpet can wear out over time, especially in high-traffic areas.
    • Allergens: Carpet can trap dust, dirt, and allergens, which might not be ideal for people with allergies.
    • Potential for Odors: Spills or pet accidents can leave lingering smells that are hard to remove.

    3. Tile Flooring

    Pros:

    • Durability: Tiles are incredibly durable and can withstand moisture, making them perfect for kitchens, bathrooms, and entryways.
    • Variety of Options: Tiles come in a wide variety of styles, sizes, and colors, allowing you to create a unique look for any room.
    • Easy to Clean: Tiles are easy to wipe down and keep clean, making them ideal for high-traffic areas.
    • Resistant to Stains and Spills: Unlike carpet or wood, tile doesn’t absorb spills and is resistant to staining.

    Cons:

    • Cold and Hard: Tile can feel cold and uncomfortable underfoot, especially in winter months. You may need area rugs for added warmth.
    • Difficult Installation: Installing tile can be labor-intensive and requires a skilled professional, which can make it more expensive.
    • Grout Issues: The grout between tiles can stain or get dirty over time, requiring occasional deep cleaning.

    4. Laminate Flooring

    Pros:

    • Affordable: Laminate is much cheaper than hardwood or tile, making it a budget-friendly option.
    • Durability: Laminate is scratch and wear-resistant, which makes it suitable for homes with children and pets.
    • Easy to Install: Laminate is often designed for easy installation, sometimes even allowing for a DIY project.
    • Variety of Styles: Laminate flooring comes in various designs, including options that mimic the look of hardwood or stone.

    Cons:

    • Not as Durable as Hardwood: While laminate is tough, it isn’t as long-lasting as hardwood and can become damaged by moisture over time.
    • Can’t Be Refinished: Unlike hardwood, laminate cannot be sanded or refinished if it gets damaged.
    • Artificial Look: While laminate can mimic real wood or stone, it may not have the same authentic look or feel as the real material.

    5. Vinyl Flooring

    Pros:

    • Waterproof: Vinyl is waterproof and perfect for high-moisture areas like bathrooms and kitchens.
    • Affordable: It’s a cost-effective flooring option compared to hardwood or tile.
    • Easy to Maintain: Vinyl is easy to clean and doesn’t require much maintenance.
    • Soft Underfoot: Unlike tile, vinyl has some give to it, making it more comfortable to stand on for long periods.

    Cons:

    • Durability Issues: Vinyl can wear out more quickly than hardwood or tile, and it’s prone to scratching.
    • Chemical Odors: Some vinyl flooring releases chemical odors, especially when newly installed, which can be unpleasant.
    • Resale Value: Vinyl doesn’t add as much value to your home as hardwood or tile, making it less appealing for future buyers.

    6. Bamboo Flooring

    Pros:

    • Eco-Friendly: Bamboo is a sustainable material that grows quickly, making it a great choice for environmentally conscious homeowners.
    • Durability: Bamboo is surprisingly strong and can last for many years when properly maintained.
    • Unique Appearance: Bamboo has a unique look that can add a modern, sleek feel to your space.

    Cons:

    • Moisture Sensitivity: Bamboo is sensitive to moisture and can warp or expand if exposed to high humidity or water.
    • Scratches Easily: While bamboo is durable, it can be scratched by pets or heavy furniture if not carefully maintained.
    • Limited Variety: Bamboo doesn’t offer as wide a range of styles and colors as hardwood or tile.

    Conclusion

    Choosing the right flooring for your home requires balancing pros and cons based on your specific needs and lifestyle. Hardwood is elegant and durable but can be expensive, while carpet offers comfort but requires maintenance. Tile and laminate provide durability and design options but may not be as comfortable underfoot. Vinyl is affordable and easy to maintain, while bamboo offers an eco-friendly alternative with its own set of pros and cons. Ultimately, the best flooring option is the one that fits your budget, lifestyle, and aesthetic preferences.

  • How to Repair Scratches on Hardwood Flooring

    How to Repair Scratches on Hardwood Flooring

    Hardwood floors add elegance and charm to any home, but they are not immune to wear and tear. Over time, scratches from furniture, pets, or heavy foot traffic can dull their beauty. Luckily, repairing scratches on hardwood flooring doesn’t have to be a difficult or expensive task. With the right tools and techniques, you can restore your floors to their original luster.

    Here’s how to repair scratches on hardwood flooring with easy and effective methods.

    1. Assess the Damage

    Before jumping into repairs, it’s essential to assess the severity of the scratches. Not all scratches require the same approach.

    • Surface Scratches: These scratches are usually light and only affect the top layer of finish. You may only need to buff them out.
    • Deeper Scratches: If the scratch goes through the finish and into the wood, you’ll need to apply a more thorough repair, such as wood filler or sanding.

    Once you’ve determined the depth, you can choose the best method for fixing the scratch.

    How to Repair Scratches on Hardwood Flooring
    How to Repair Scratches on Hardwood Flooring

    2. Use a Wax Stick or Wood Filler

    For light scratches, a wax stick or wood filler can be a quick and effective solution. These products are designed to fill in the scratch, making it less visible.

    • Wax Stick: Wax sticks come in various wood tones and are ideal for minor surface scratches. Simply rub the wax over the scratch, ensuring it fills in the gap. Then, use a cloth to buff the area and blend it with the surrounding floor.
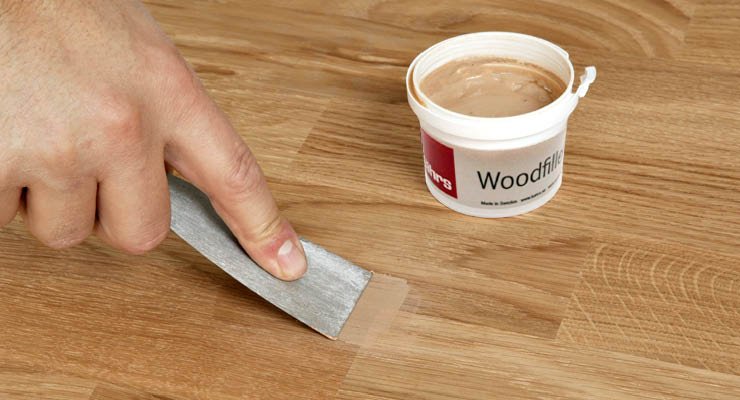
    • Wood Filler: For slightly deeper scratches, wood filler may be necessary. Select a wood filler that matches the color of your floor, apply it into the scratch, and smooth it with a putty knife. Allow the filler to dry, and then gently sand it to make the surface even.

    Both wax sticks and wood fillers are quick and easy solutions that can blend minor damage into the rest of the floor.

    3. Buff the Scratch Out

    If the scratch is superficial, buffing may be all you need to restore your floor’s appearance. Here’s how:

    • Clean the Floor: Start by cleaning the area around the scratch with a mild cleaner to remove dirt and debris.
    • Buffing Pad: Use a soft cloth or a buffing pad attached to a floor buffer (if available) to gently buff the scratched area. Apply gentle pressure and work in small, circular motions.
    • Polish the Area: Once the scratch is no longer visible, apply a small amount of wood polish or wax to enhance the shine and protect the floor.

    Buffing is a simple and effective way to eliminate minor scratches and restore the floor’s surface.

    4. Sanding and Refinishing

    For deeper scratches that penetrate the wood’s surface, you may need to sand and refinish the area. This method works well for scratches that can’t be fixed with fillers or buffing alone.

    • Sanding the Scratch: Start by lightly sanding the area with fine-grit sandpaper. Sand in the direction of the wood grain to avoid further damage. Sand until the scratch disappears, and the surface is smooth.
    • Staining (If Needed): If sanding removes the color of the wood, apply a wood stain that matches your floor’s tone. Allow it to dry completely.
    • Refinishing: After sanding and staining, apply a clear wood finish (polyurethane or varnish) to the repaired area. This will protect the wood and bring back its shine. Apply a few coats for durability, letting each coat dry before adding another.

    This method is perfect for addressing deeper scratches and ensuring that your floor looks as good as new.

    5. Use a Wood Repair Marker or Pen

    For minor scratches, a wood repair marker or pen is a convenient and inexpensive fix. These markers come in various wood colors and can be used to conceal small imperfections on the surface.

    • How to Use: Shake the marker well and apply it directly to the scratch. Once applied, wipe away any excess with a soft cloth. Let it dry completely.
    • Blending: After the marker dries, gently buff the area to help it blend into the surrounding wood.

    Wood repair markers are ideal for minor scratches and quick fixes.

    6. Apply a New Coat of Finish (If Necessary)

    If your floor has multiple scratches or is showing signs of wear, you may want to apply a new coat of finish to restore its overall appearance.

    • Prepare the Surface: Clean the floor thoroughly and sand lightly to remove the old finish. This will help the new finish adhere better.
    • Apply the Finish: Choose a polyurethane or varnish finish suitable for your floor. Apply a thin, even layer with a brush or a roller.
    • Dry and Buff: Allow the finish to dry according to the manufacturer’s instructions. Once dry, buff the floor lightly to ensure a smooth surface.

    This process not only covers scratches but also refreshes the entire floor’s look.

    7. Prevent Future Scratches

    Once you’ve repaired the scratches, it’s essential to take steps to prevent new ones from forming. Here are a few tips:

    • Use Furniture Pads: Place felt pads or rubber protectors on the legs of furniture to prevent scratches when moving items around.
    • Clean Regularly: Dirt and debris can act as abrasives, causing scratches. Sweep or vacuum the floor regularly to keep it clean.
    • Use Rugs or Mats: Place rugs or mats in high-traffic areas to protect your floor from scratches and wear. Ensure the mats have non-slip backing to prevent them from shifting.
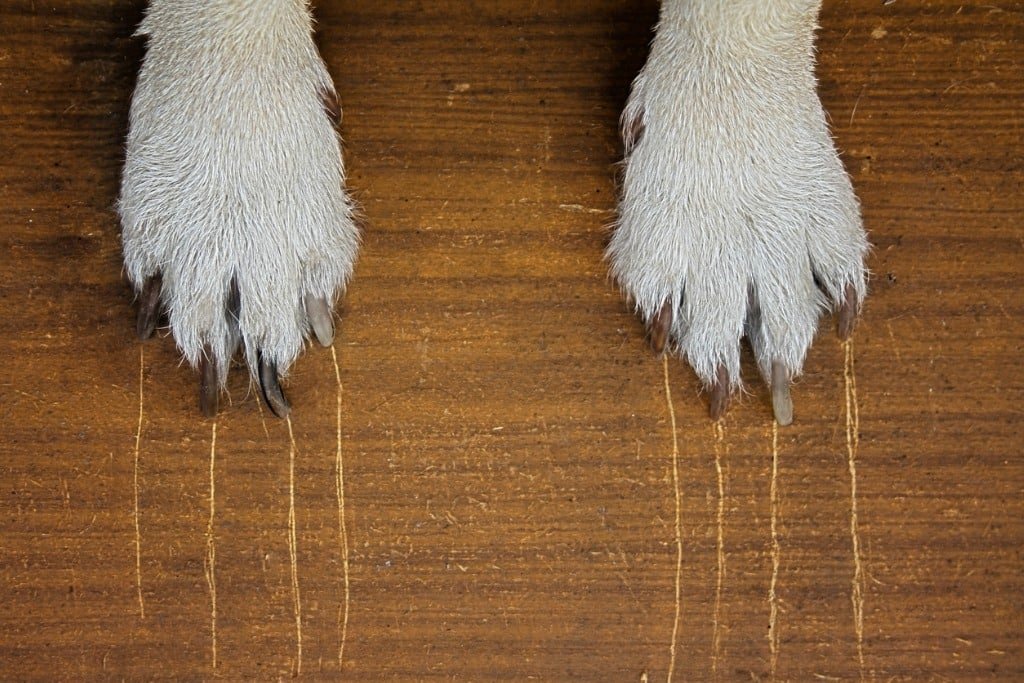
    • Trim Pet Nails: If you have pets, regularly trim their nails to avoid scratches from claws.

    By taking these precautions, you can keep your hardwood floors looking pristine for years to come.

    Conclusion

    Scratches on hardwood flooring are common, but they don’t have to be permanent. Whether the damage is light or deep, there are several methods available to restore your floors. From using wax sticks and wood fillers to sanding and refinishing, each technique offers a way to make your floor look as good as new. With a little effort and care, you can repair scratches and protect your hardwood floors for long-lasting beauty and durability.

  • Top Eco-Friendly Flooring Choices

    Top Eco-Friendly Flooring Choices

    With growing awareness of environmental impact, many homeowners are seeking sustainable flooring options that are both eco-friendly and stylish. Choosing eco-friendly flooring materials not only helps reduce your carbon footprint but also creates a healthier living environment. If you’re looking to make a more environmentally conscious decision, here are some of the top eco-friendly flooring choices for your home.

    1. Bamboo Flooring

    Bamboo is one of the most popular eco-friendly flooring choices due to its sustainability and durability. Bamboo is a fast-growing grass that can be harvested in just a few years, unlike hardwood trees, which take decades to mature.

    • Why It’s Eco-Friendly: Bamboo grows quickly and can be harvested without damaging the environment, making it a renewable resource. It also requires less water and pesticides compared to traditional hardwood.
    • Pros: Strong, durable, renewable, easy to maintain.
    • Cons: Can be scratched or dented more easily than hardwood; lower-quality bamboo can be prone to warping.
    • Best For: Living rooms, bedrooms, kitchens, and hallways.

    2. Cork Flooring

    Cork is an all-natural, renewable material made from the bark of cork oak trees. When harvested, the tree’s bark regrows, making it a sustainable option for eco-conscious homeowners.

    • Why It’s Eco-Friendly: Cork is biodegradable and made from a renewable resource. The process of harvesting cork doesn’t harm the trees, and cork flooring is also energy-efficient due to its natural insulation properties.
    • Pros: Soft, comfortable underfoot, sound-absorbing, durable, hypoallergenic.
    • Cons: Can be damaged by water or heavy furniture; may fade in direct sunlight.
    • Best For: Bedrooms, living rooms, and offices.
    Top Eco-Friendly Flooring Choices
    Top Eco-Friendly Flooring Choices

    3. Recycled Hardwood Flooring

    Recycled hardwood flooring uses reclaimed wood from old buildings, furniture, or other sources. Instead of cutting down new trees, the wood is repurposed, giving it new life while reducing the demand for logging.

    • Why It’s Eco-Friendly: Reclaimed wood is environmentally friendly because it prevents waste and reduces the need for new timber. It also has a unique, rustic appearance due to its age and character.
    • Pros: Unique look, sustainable, high-quality material, durable.
    • Cons: Limited availability, can be expensive, may require more maintenance.
    • Best For: Living rooms, dining rooms, and home offices.

    4. Linoleum Flooring

    Linoleum is made from natural materials like linseed oil, cork dust, and wood flour, making it one of the most eco-friendly flooring options available. It has been used for over a century due to its durability and versatility.

    • Why It’s Eco-Friendly: Linoleum is made from renewable, natural materials and is biodegradable. It’s also low in VOCs (volatile organic compounds), which makes it a healthier option for indoor air quality.
    • Pros: Durable, easy to clean, biodegradable, naturally antimicrobial.
    • Cons: Can be scratched or dented easily, may need periodic sealing.
    • Best For: Kitchens, bathrooms, and high-traffic areas.

    5. Natural Stone Flooring

    Natural stone, such as slate, granite, and marble, is another eco-friendly flooring choice. These materials are abundant and long-lasting, reducing the need for replacement over time.

    • Why It’s Eco-Friendly: Natural stone is durable and requires minimal maintenance. It also has a long lifespan, which means fewer replacements are needed, making it a sustainable option in the long run.
    • Pros: Timeless, durable, low-maintenance, adds value to your home.
    • Cons: Can be expensive, cold underfoot, may require sealing.
    • Best For: Kitchens, bathrooms, and entryways.

    6. Recycled Glass Flooring

    Recycled glass flooring is made from, you guessed it, recycled glass. It can be used in tiles or other flooring applications, adding an eco-friendly, modern touch to your home.

    • Why It’s Eco-Friendly: Glass is one of the easiest materials to recycle, and using recycled glass for flooring helps reduce waste and the environmental impact of producing new glass.
    • Pros: Stylish, durable, resistant to stains, easy to clean.
    • Cons: Can be expensive, may require more maintenance to keep its shine.
    • Best For: Kitchens, bathrooms, and living areas.

    7. Sustainable Carpet (Made from Natural Fibers)

    Carpet made from natural fibers, such as wool, jute, and sisal, is a more sustainable alternative to synthetic carpets. These materials are biodegradable and don’t contribute to plastic waste.

    • Why It’s Eco-Friendly: Natural fiber carpets are made from renewable resources, and they break down naturally when discarded. They also have fewer chemicals compared to synthetic carpets.
    • Pros: Biodegradable, natural feel, hypoallergenic, comfortable.
    • Cons: Can be expensive, requires regular cleaning, may stain easily.
    • Best For: Bedrooms, living rooms, and offices.

    8. Recycled Rubber Flooring

    Recycled rubber flooring, often made from used tires, is gaining popularity due to its durability and sustainability. It’s commonly used in commercial settings but is also making its way into residential homes.

    • Why It’s Eco-Friendly: Rubber flooring made from recycled tires helps reduce waste, and it’s extremely durable, which means it will last for years and reduce the need for replacements.
    • Pros: Durable, slip-resistant, easy to clean, absorbs sound.
    • Cons: Can be expensive, may not fit every style.
    • Best For: Playrooms, gyms, and high-traffic areas.

    9. Palmwood Flooring

    Palmwood is a unique and eco-friendly flooring option that is made from the palm tree. Unlike hardwood, which comes from slower-growing trees, palmwood is fast-growing and highly sustainable.

    • Why It’s Eco-Friendly: Palmwood is harvested from trees that have reached the end of their natural life cycle, so it doesn’t require the destruction of healthy forests.
    • Pros: Sustainable, unique appearance, strong and durable.
    • Cons: Can be hard to find, may be more expensive.
    • Best For: Living rooms, dining rooms, and kitchens.

    10. Wool Carpet

    Wool carpet is an eco-friendly alternative to synthetic carpets, as it’s made from a natural, renewable resource. It’s also biodegradable, making it a great choice for homeowners looking for a sustainable flooring option.

    • Why It’s Eco-Friendly: Wool is a renewable resource, and its production has a relatively low environmental impact compared to synthetic fibers. It’s also naturally resistant to dirt and stains, reducing the need for harsh cleaning products.
    • Pros: Natural, durable, biodegradable, soft and comfortable.
    • Cons: Can be more expensive than synthetic options, requires maintenance to preserve appearance.
    • Best For: Bedrooms, living rooms, and home offices.

    Conclusion

    Choosing eco-friendly flooring not only helps reduce your environmental impact but also improves the overall health and comfort of your home. From bamboo and cork to recycled rubber and natural stone, there are many sustainable flooring options that offer beauty, durability, and long-lasting performance. When selecting the best eco-friendly flooring for your space, consider factors such as durability, maintenance needs, and design preferences. By making environmentally conscious choices, you can create a stylish, sustainable home while contributing to the health of the planet.

  • Best Budget-Friendly Flooring Alternatives

    Best Budget-Friendly Flooring Alternatives

    Renovating your home or updating a room often involves choosing the right flooring, but high-quality flooring can be expensive. Thankfully, there are many budget-friendly flooring alternatives that still look great, are durable, and are easy to maintain. Whether you’re updating a small area or renovating a large space, these affordable flooring options can help you get the look you want without stretching your budget.

    1. Laminate Flooring

    Laminate flooring is one of the most popular and budget-friendly flooring alternatives. It mimics the look of hardwood, stone, or tile at a fraction of the cost. Laminate is made from a composite wood core with a high-resolution photo layer that creates a realistic appearance.

    • Why It’s Budget-Friendly: Laminate is much cheaper than hardwood or stone flooring, and it’s easy to install, which can save you on professional installation costs.
    • Pros: Durable, easy to maintain, available in a wide range of styles.
    • Cons: Can be scratched easily, not as durable as real wood or stone.
    • Best For: Living rooms, hallways, and bedrooms.
    Best Budget-Friendly Flooring Alternatives
    Best Budget-Friendly Flooring Alternatives

    2. Vinyl Flooring

    Vinyl flooring has come a long way in terms of both quality and design. Today, luxury vinyl plank (LVP) and vinyl tiles (LVT) offer realistic wood, stone, and tile looks at a lower cost. It’s a versatile option that can work in any room.

    • Why It’s Budget-Friendly: Vinyl is one of the least expensive flooring materials available, and it’s often sold as peel-and-stick or click-lock tiles, which are easy to install yourself.
    • Pros: Water-resistant, low-maintenance, durable, comes in many styles.
    • Cons: Can be damaged by heavy furniture or sharp objects, lower-quality options may fade over time.
    • Best For: Kitchens, bathrooms, laundry rooms, and entryways.

    3. Carpet Tiles

    Carpet tiles offer an affordable and flexible solution for flooring. These tiles are easy to install and replace, making them ideal for DIY projects. Carpet tiles also come in a variety of colors and patterns, making it simple to match your décor.

    • Why It’s Budget-Friendly: Carpet tiles are more affordable than traditional wall-to-wall carpeting, and they can be replaced individually if damaged, saving you money in the long run.
    • Pros: Comfortable, easy to install and replace, comes in a variety of designs.
    • Cons: Can stain easily, requires regular vacuuming, may need occasional cleaning.
    • Best For: Home offices, bedrooms, and playrooms.

    4. Engineered Wood Flooring

    Engineered wood is an affordable alternative to solid hardwood. It consists of multiple layers of wood, with a hardwood veneer on top. This provides the beauty of hardwood but at a lower cost.

    • Why It’s Budget-Friendly: Engineered wood is typically cheaper than solid hardwood, and it’s more stable in areas with fluctuating temperatures and humidity.
    • Pros: Real wood look, more durable than laminate, relatively easy to install.
    • Cons: Can be scratched or dented, requires some maintenance.
    • Best For: Living rooms, dining rooms, and bedrooms.

    5. Concrete Flooring

    Concrete is an incredibly affordable and durable flooring option that’s often overlooked. It can be polished, stained, or painted to create a stylish look. Many homeowners are opting for concrete floors in areas like kitchens and basements.

    • Why It’s Budget-Friendly: Concrete floors are often already present in homes, so you may not need to install new flooring. Even if you do, it’s one of the most affordable materials available.
    • Pros: Very durable, low-maintenance, customizable with stains and colors.
    • Cons: Hard and cold underfoot, can be slippery when wet.
    • Best For: Basements, kitchens, and garages.

    6. Cork Flooring

    Cork is a unique, eco-friendly flooring option that’s surprisingly affordable. It’s made from the bark of cork oak trees, and when harvested correctly, it doesn’t harm the tree. Cork floors are soft, comfortable, and provide good insulation.

    • Why It’s Budget-Friendly: Cork is generally less expensive than hardwood, and it’s easier to install, which reduces labor costs.
    • Pros: Comfortable, eco-friendly, natural sound insulation, warm underfoot.
    • Cons: Can be easily scratched, vulnerable to water damage.
    • Best For: Living rooms, bedrooms, and offices.

    7. Linoleum Flooring

    Linoleum is often confused with vinyl, but it’s a natural material made from linseed oil, wood flour, cork dust, and resins. It’s eco-friendly, affordable, and durable, making it a great alternative for budget-conscious homeowners.

    • Why It’s Budget-Friendly: Linoleum is a low-cost material that is easy to maintain and can last for decades with proper care.
    • Pros: Eco-friendly, durable, easy to clean, available in many colors and patterns.
    • Cons: Can scratch or dent easily, needs to be sealed regularly.
    • Best For: Kitchens, bathrooms, and high-traffic areas.

    8. Peel-and-Stick Tiles

    Peel-and-stick tiles are a simple and cost-effective flooring solution. These tiles come in vinyl, ceramic, and even stone options. They are designed for easy installation with no grout or glue required.

    • Why It’s Budget-Friendly: Peel-and-stick tiles are an inexpensive way to update a floor, and because they’re easy to install, you can save money on installation costs.
    • Pros: Easy to install, affordable, comes in a wide variety of designs.
    • Cons: Less durable than traditional flooring options, may peel or chip over time.
    • Best For: Kitchens, bathrooms, and small spaces.

    9. Rubber Flooring

    Rubber flooring, made from recycled rubber tires, is gaining popularity as a budget-friendly option, especially in high-traffic areas like home gyms or playrooms. It’s highly durable and provides comfort underfoot.

    • Why It’s Budget-Friendly: Rubber flooring is made from recycled materials, which makes it a cost-effective and environmentally friendly option.
    • Pros: Durable, slip-resistant, easy to clean, comfortable.
    • Cons: May not suit every home décor style, can be harder to find in certain colors.
    • Best For: Playrooms, gyms, and basements.

    10. Plywood Flooring

    If you’re looking for a truly budget-friendly option, consider plywood flooring. It’s simple, affordable, and can be stained or painted to suit your style. Plywood is durable and can be a great choice for minimalist or rustic designs.

    • Why It’s Budget-Friendly: Plywood is inexpensive, and you can even install it yourself to save on installation costs.
    • Pros: Affordable, customizable, can be installed as a DIY project.
    • Cons: May require finishing or sealing, can show wear over time.
    • Best For: Bedrooms, home offices, and studios.

    Conclusion

    There are many budget-friendly flooring alternatives available that can help you update your home without spending a fortune. From laminate and vinyl to cork and plywood, these options offer durability, style, and ease of installation. By choosing one of these affordable flooring solutions, you can achieve the look you want without breaking your budget. Whether you’re updating a single room or renovating your entire home, these flooring choices will help you create a beautiful, functional space for less.

  • Hardwood Flooring Installation Guide Tips

    Hardwood Flooring Installation Guide Tips

    Installing hardwood flooring can transform your space, adding elegance and value to your home. However, the installation process requires careful planning, preparation, and the right tools to ensure a successful outcome. Whether you’re a beginner or an experienced DIYer, this guide will walk you through essential tips and techniques to help you install hardwood flooring like a pro.

    Hardwood Flooring Installation Guide Tips
    Hardwood Flooring Installation Guide Tips

    1. Choose the Right Hardwood Flooring

    Before starting the installation, it’s important to select the right type of hardwood flooring for your space. There are two main types of hardwood: solid and engineered. Solid hardwood is a single piece of wood, while engineered hardwood consists of multiple layers for added stability. If you’re installing hardwood in areas with high humidity, such as basements, engineered hardwood may be a better option.

    Tip: Always check the wood’s moisture content to avoid expansion or contraction after installation.

    2. Prepare the Subfloor

    The subfloor must be clean, dry, and level to ensure proper installation. If your subfloor is uneven, use a self-leveling compound to smooth it out. If you’re working with a concrete subfloor, make sure it is completely dry to prevent moisture issues that can damage your hardwood. Remove any nails, staples, or debris from the subfloor before starting.

    Tip: If your subfloor is made of plywood, check for any loose boards and secure them with screws to prevent creaking.

    3. Acclimate the Hardwood Flooring

    Wood is a natural material that expands and contracts with changes in humidity. To prevent any issues after installation, it’s crucial to acclimate the hardwood flooring to the room’s temperature and humidity. Leave the hardwood planks in the room where they will be installed for at least 48 to 72 hours before starting the installation process.

    Tip: Keep the room temperature between 60°F and 80°F (15°C to 27°C) during the acclimation period.

    4. Gather the Necessary Tools and Materials

    Having the right tools will make the installation process much easier and more efficient. Here are the essential tools and materials you’ll need:

    • Tape measure
    • Miter saw or circular saw
    • Hammer and nails or flooring nailer
    • Rubber mallet
    • Spacers
    • Wood glue (if required)
    • Chalk line or laser level

    Tip: If you don’t have a flooring nailer, you can rent one from most home improvement stores.

    5. Plan the Layout

    Before you start installing the hardwood planks, it’s essential to plan the layout. Begin by finding the center of the room and snapping a chalk line or using a laser level to create a reference line. This will help ensure the planks are straight and aligned. Plan to install the planks parallel to the longest wall in the room for a more natural and aesthetic look.

    Tip: Leave a small gap (about 1/4 inch) between the planks and the walls to allow for expansion.

    6. Start Installing the Hardwood Flooring

    Begin installing the hardwood planks along the reference line, working your way across the room. Use spacers to maintain the expansion gap between the planks and the walls. If you’re using a nail-down method, hammer the nails into the tongue of each plank at a 45-degree angle. Alternatively, use a flooring nailer to secure the planks to the subfloor.

    Tip: Stagger the seams of the planks to create a more natural look and prevent the seams from lining up.

    7. Cut the Planks to Fit

    You’ll likely need to cut the hardwood planks to fit along the edges of the room. Use a miter saw or circular saw to cut the planks to the required length. For areas around obstacles, such as door frames or vents, use a jigsaw to make precise cuts.

    Tip: When cutting planks, always measure twice and cut once to ensure accuracy.

    8. Install the Final Row of Planks

    The final row of planks may need to be trimmed lengthwise to fit the space. Measure the width of the last row, and cut the planks accordingly. If needed, use a tapping block and mallet to gently tap the last row into place. Be sure to leave a small gap between the last row and the wall for expansion.

    Tip: If you’re installing hardwood in a large room, consider leaving a gap between the planks for better air circulation during installation.

    9. Sand and Finish the Floor

    Once all the planks are installed, you may need to sand the floor to smooth out any uneven areas and remove any rough spots. After sanding, apply a protective finish to enhance the wood’s appearance and durability. You can choose from different finishes, such as polyurethane or oil-based finishes, depending on the look and level of protection you want.

    Tip: Make sure to allow the finish to dry completely before walking on the floor.

    10. Clean and Maintain Your Hardwood Flooring

    After installation, it’s important to regularly clean and maintain your hardwood flooring to keep it looking great. Sweep or vacuum the floor regularly to remove dirt and debris. Use a damp mop with a hardwood floor cleaner to clean the surface, but avoid excessive water, as it can damage the wood. Consider placing rugs or mats in high-traffic areas to protect the floor from wear and tear.

    Tip: Use felt pads under furniture to prevent scratches and dents.

    Conclusion

    Installing hardwood flooring can be a rewarding and worthwhile project that adds beauty and value to your home. By following these tips and taking your time to prepare and install the flooring correctly, you can achieve professional-looking results. Remember to plan your layout, use the right tools, and care for your floor to ensure it lasts for many years to come.